Microsoft is currently working on the next major release of Windows, called Windows 10. Currently, Windows 10 is in technical preview mode, with millions of people testing it across the world
via their Windows Insider Program. I have been part of the Insider Program for a while now and have been through several releases and thought I would share some initial
impressions of Windows 10.
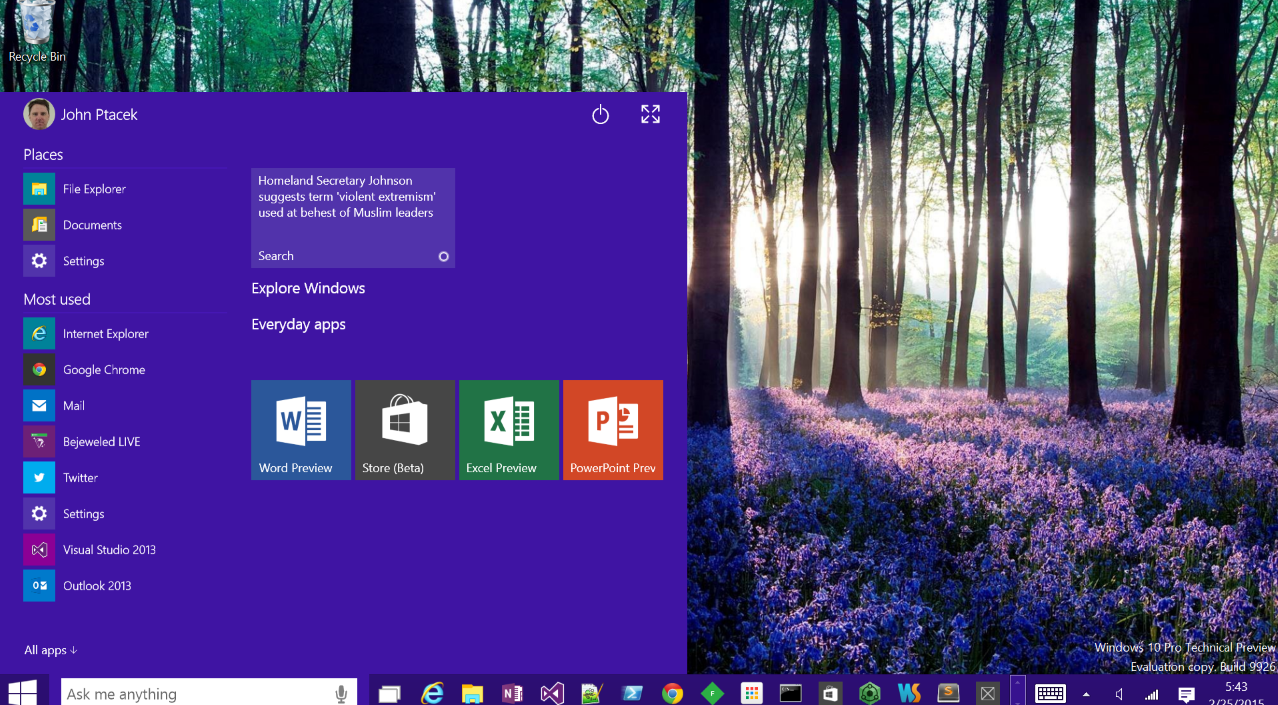
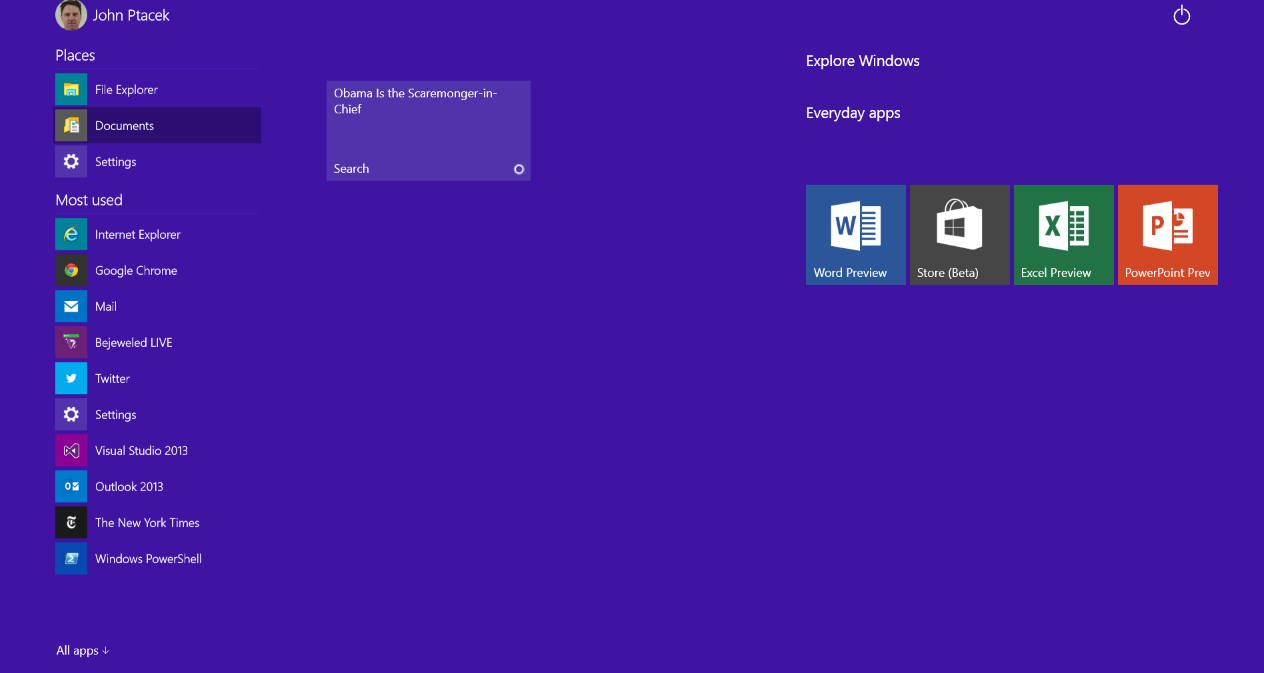
Start Menu
For most users, one of the biggest changes is the Start Menu is back. In Windows 8, the Start Menu was replaced by the Start Screen. Many users found this disconcerting as you moved back and forth between full screen “Windows Modern” and the traditional desktop mode. Microsoft is addressing this heads on by bringing back the start menu. It is also making the start menu more “modern”, by including Microsoft’s innovative Live Tiles in the start menu.
Cortana
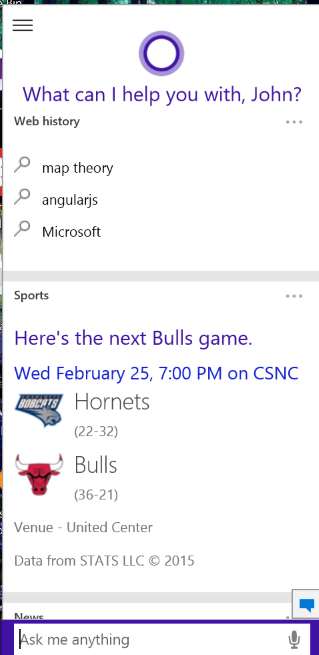
Microsoft’s Cortana has been a big hit on Windows Phone. It is a voice driven assistant, similar to Google Now or Apple’s Siri. You can click the search icon and “talk” to Cortana and have it perform searches for you. You can even change some settings and say “Hey Cortana” and have it do searches for you.
Cortana also bills itself as a personal digital assistant. It is able to parse through emails and documents and “learn” about you. So if you have a flight on Delta and you say Hey Cortana, Delta, it will show information about you flight.
It also knows I like the Chicago Bulls, so it keeps information front and center. It is also nice enough not to mention that Derick Rose is out for the rest of the season, again.
Again, all of this code is pre-release and may change, but so far Cortana looks like a great feature for Windows 10.
Continuum
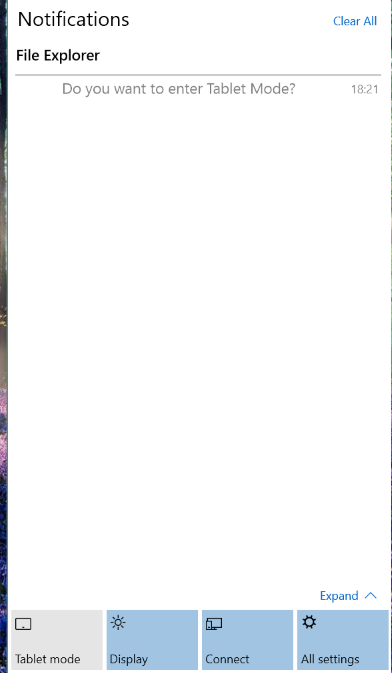
One of the biggest issues many people had with Windows 8 was how the tablet/modern mode was so prevalent and jarring in desktop mode. Microsoft is again addressing, heads on, one of the major Win 8 complaints, by including a new feature called Continuum. Continuum is there to make dual use machines like a Microsoft Surface function even better.
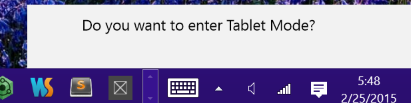
Users can decide to go to Tablet Mode, either via the Notification Bar and selecting Tablet Mode or by disconnecting/connecting a keyboard and responding to the prompt. This will then put have your apps run full screen making them more touch friendly and applicable to running on a tablet.
When you are running in desktop mode, applications are then windowed, including “Modern” apps. Previously, “Modern” apps would run in full screen mode for all users. This is a pretty significant change from Microsoft and highlights how they are enabling users to be productive if they are in tablet mode or desktop mode.
Universal Apps
One of the biggest changes under the hood of Windows promises to be Universal Apps. This is a single platform that enables to developers to develop an application for Windows, Windows Phone and the Xbox One. Microsoft is hoping this will reignite developer interest as the multi platform development opens up many new opportunities.
All Roads Lead to Build
Microsoft’s Build Conference at the end of April 2015 promises to have A LOT more information on the new version of Windows, especially for developers. We will all know more soon after that. Windows 10 is supposed to be available in the second half of 2015.
AngularJS is a Javascript MVC framework from the fine folks over at
Google. The focus of Angular is building complex
HTML based client applications. Its design philosophy is data first, where your data will be updating the DOM.
Contrast this to a framework like JQuery where the DOM will update your data.
This is the eleventh in a series of posts on AngularJS where we are using Chemistry data from the periodic table
to help us understand the framework. The others posts are
Note: AngularJS does not allow for more than one ng-app directive. When I have multiple angular posts on
the home page of my blog, only one application will work. I need to refactor the entire site to account for
this. All of that to say this, you are best clicking on a single article so you can see the pages in action.
This blog series on AngularJS has been going on for a while, since October 2013 to be exact. In that time, AngularJS
has changed and best practices have emerged. I thought it would be worth taking a look at the current state of best
practices and refactoring some of the code we have been working on to reflect that.
To start off, there are people a lot smarter than me thinking about this stuff. Some of these folks work at Google and
they have published a style guide you can find at the
Google Code site.
The Google Style Guide is a good start, but it it not as complete as some I have run across. It also is heavily focused
on Closure, a Google toolset that not everybody is invested in.
A second great resource is Todd Motto's AngularJS Style Guide. Todd has a
blog post where he introduces his reasoning for some
of his choices. Cooler yet, he has a GitHub repository
that he keeps up to date with his latest set of changes and reasoning behind them.
A third resource is from John Papa, one time Microsoft evangelist and Google Developer
Expert. Like Todd, John has a GitHub repo with his Style Guide.
The great thing about what both Todd and John have done by putting their Style Guides on GitHub is that it makes it
easy to make one of them YOUR Style Guide. Clone the repo and publish within your organization. It is a great way to get
started and introduce consistency within your organization.
I have decided to gnerally follow the style guide setup by John Papa. I find his
Pluralsight courses to be
great resources for developers and you have to start some place.
###IIFE###
The first thing we are going to do to our code is to rework how our code to implement IIFEs. IIFEs stand for Immediately-Invoked
Function Expressions, pronounced 'iify'. This is a standard JavaScript best practice to isolate scope of functions.
JavaScript has a single execution scope, as you load more and more libraries and variables, you run into the "opportunity"
for name collisions. This makes for a very painful day of code debugging.
IIFEs then are a common pattern to use to avoid polluting the namespace. It works to keep all of the variables
localized to the scope of the function being executed. We also end up being able to optimize minification, since our
variables are localized.
The general syntax of an IIFE is
(function(){
/* code */
})();
The function executes immediately, thanks to the parens at the end of the function call.
We have been bad programmers in our code examples, so we will clean this up and be better moving forward. This
ends with us reworking our JavaScript code. Here is a before/after example for our app.js file.
Before:
'use strict';

var chemistryApp = angular.module('chemistryApp', []);
After:
(function(){
'use strict';
var chemistryApp = angular.module('chemistryApp', []);
})();
Ben Alman is credited with nameing IIFEs in this blog post
if you want more information
###Getter/Setter###
The next step we want to take to improve our code is how we are creating and referencing our module. Initially we were
using code based on AngularJS.com samples, where we declare a module as a variable, for example:
var chemistryApp = angular.module('chemistryApp', []);
The recommendation, straight from the Angular site is to use the getter
syntax at all times. The syntax above, will create the module each time, overwriting the existing one.
Getter syntax for the module enables us to retrieve an existing module. We rework our app.js to now incorporate
both IIFE and setter syntax to become
###Named Functions###
Next, we are going to rework our code to utilize named functions, mostly for code readability as it reduces the amount
of callback functions in our code.
For our Controller definition we could define our function with a callback as
###Dependency Injection###
AngularJS has a great Dependency Injection (DI) framework. The way we have the code working above can cause some issues
with things like bundling and minification. When minification tools rename our DI functions, they may not be found
by Angular. As a result, you should explicitly identify DI functions to avoid this.
The reasons for this approach are the same as above, bypassing minfication issues. This approach though is more
explicit and makes the code more readable.
###Explicit function declarations###
Another good practice is to explicitly identify function definitions. If we look at our original service function
the structure was
which is kind of what we want. One of the places where Papa and Motto differ on their approaches though is WHERE
the function declarations should happen. Papa prefers that start of the service and Motto towards the bottom. I lean
towards the Papa approach because I can explicitly see my "public interfaces" for the function. This is ultimately
what we want to be testable in our code. However, the downside is some scrolling to get to the implementation details.
Ultimately, make a choice and be consistent.
###Directory Structure###
Next up is best practices for directory structure. Ultimately, we are not going to refactor this code to reflect this best
practice. However, in the real world, where I do this for a living, I definitely follow the practice outlined below.
What we have here is too small.
Initially, when you start creating an Angular app, most people start by organizing my folders by the type of code they are writing.
This results in a folder for controllers, one for services, directives, etc. This can work at the beginning, but by the
the time you are working on a large app, it becomes difficult. Having 15 controller functions in a directory, then
searching for the corresponding service functions in another directory is NOT efficient.
Instead, the recommendation is to organize folders by function. For example, if you have a sports application you
would have a baseball folder with controller, service and directive files in that directory applicable to baseball.
All the functionality is
concisely gathered in a single folder location. Much easier.
###Wrapping Up###
I have reworked the code for the app we have been talking about to reflect the best practices outlined above. The
functionality is the same as last time, but ultimately, a bit more maintainable long term and less likely to run
into issues with minification and bundling. The app doesn't look a whole lot different though, which is a good thing.
Ultimately, the goals of what we are doing is to make the code more explicit, more readable and ultimately more
maintainable. Both Papa and Motto have great approaches and styles. Pick what works for you and be cosistent within
your projects and teams.
I am a fan, a HUGE fan, of Microsoft's Azure platform, especially their Azure Websites.
This blog, jptacek.com has been hosted
on Azure for several iterations. First as a blog on WordPress, and later, as a blog being generated using
DocPad. Feel
free to follow my Wordpress and DocPad
adventures. Further, when I speak at events, I often say the subtitle of my talk should be
"Azure, a love story". It is awesome and it
is a great tool for developers.
The only thing that causes me a slight measure of discomfort is that it costs actual money to host my blog on Azure.
I am fine paying money, especially
for things I think are awesome, like Azure. However, my site, after migrating to DocPad is pretty stupid, it is just
static HTML. Having a server for that can be a bit of overkill.
They have a platform for serving up static HTML. I think the thing that first
time I had a seed planted was a blog post
that Phil Haack did about moving his personal blog
to GitHub Pages. In it, he steals a
tweet from Zach Holman, one of his GitHub colleagues.
@haacked the ops team gets paged when http://zachholman.com is down. You still have a lot to learn, buddy
I thought that was a pretty good line. I also realize it is the same thing Microsoft does on their cloud platform, but
it DID inspire me to dig a bit more into GitHub pages. At the time I looked, it was pretty focused on Jekyll, which
I shied away from it based on its Ruby background (more info about my decision
here ). A year later though, I have gotten a bit more
comfortable with DocPad, and have a workflow to get my pages published to GitHub Pages.
What are GitHub Pages? They are public webpages that are hosted on GitHub's infrastructure. They do NOT support
HTTPS, so you won't want to host eCommerce sites on it. However, for blogs and other public content they work great.
You can use Jekyll, which is a Ruby based static site generator. It is similar to DocPad. One benefit of using Jekyll
with GitHub pages though is that you can check in your posts into your GitHub repository and it will automatically
generate the site for you.
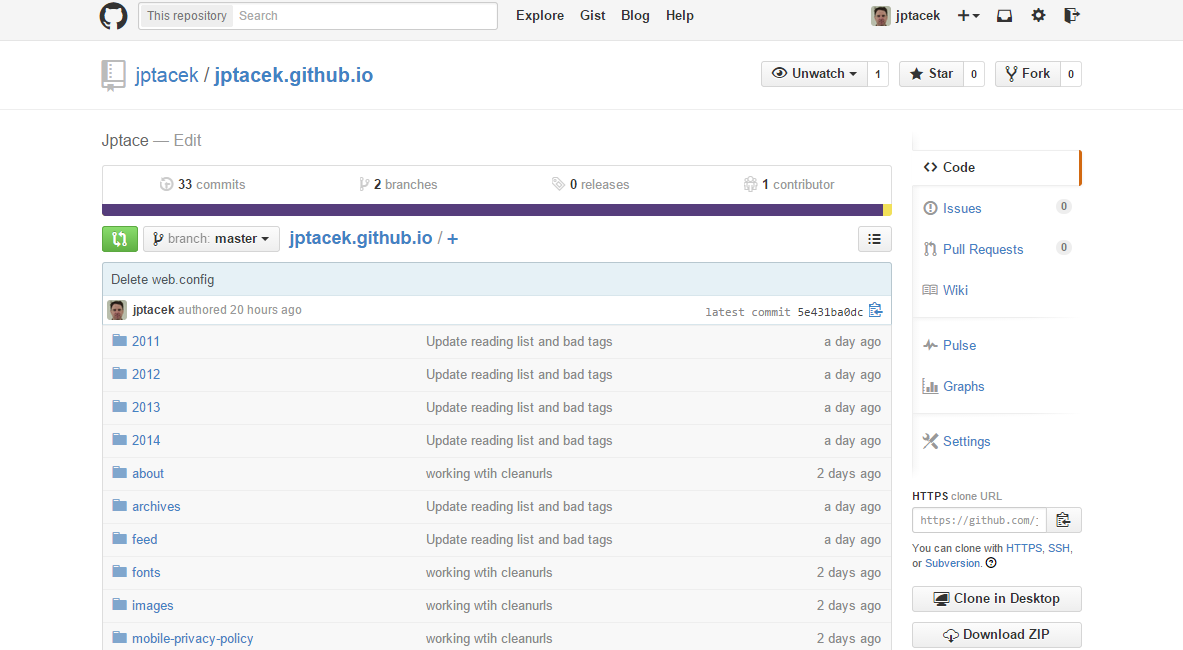
There are two types of GitHub pages, User/Organization and Project sites. This blog, JPtacek.com
is a User site. For User/Organization pages, GitHub will take content committed to the repository username.github.io,
where username is a user's GitHub account. For me, this essentially means I check in my content to a the GitHub repository
https://github.com/jptacek/jptacek.github.io. HTML content checked into this repository is then
automatically deployed to a static site at the URL https://jptacek.github.io. You can find out
more about this at GitHubs site https://pages.github.com/.
It is worth noting that GitHub Pages User/Organization pages get checked into the master branch of the repository.
GitHub project sites, which are for, wait for it....., projects, are a bit different. One of those differences is that
they have content checked into the GHPages branch of the project.
So far, so good. However, the site has been living at a specific domain for a while, which I would really like to
continue to use. Of course, GitHub pages also supports custom domain names for a site. Instructions are
available online. Essentially though,
it is pretty slick and quick to do. You check in a single file called CNAME (all caps) into your username.github.io
repository. This file should be in the root of your repository and have the URL of the site, in my case, www.jptacek.com,
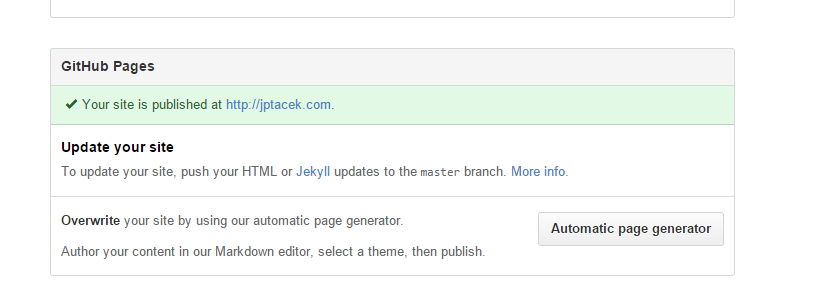
without any http:// in front. After committing your changes you can click settings in your repository
and you can then verify the URL is set
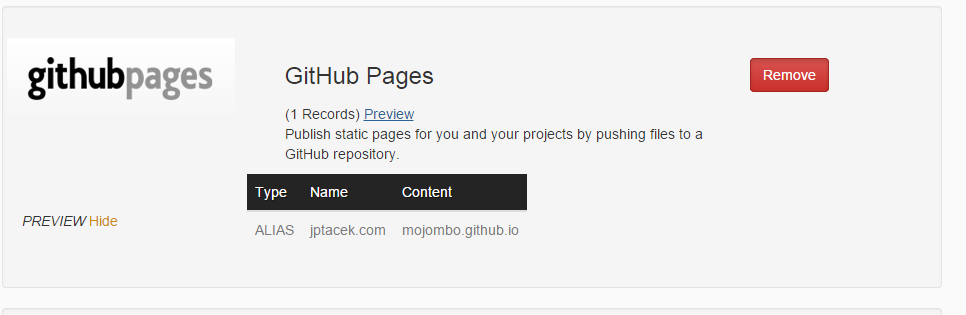
We have GitHub all set to serve up our requests, but now we need to actually do some work with DNS to do that. I use
DNSimmple to manage my DNS. Part of the neat things about DNSimple is they keep it simple :).
There is a template setup for you to enable GitHub pages already present. It will add an Alias record for you and
you are on your way
So we have a site ready to go and it is live on the Internet, but we need content! Previously, through the magic of
Azure, I would check in my blog content as a markdown file, Azure would read the check ins from my GitHub repository,
download appropriate NPM pacakges, compile my markdown to static HTML and publish a site. All pretty cool. That is gone
now. So instead of having the cloud compile my markdown, I am now doing it all local. This is the main negative for me
about moving to GitHub pages, but sometimes freedom has a cost :).
Since I will be dealing with two GitHub repositories, I reworked my workflow a bit. My site, and all of it's content
and DocPad assets lives in GitHub at https://github.com/jptacek/JPtacek.com
and my static blog content, needs to be in
https://github.com/jptacek/jptacek.github.io to get published to
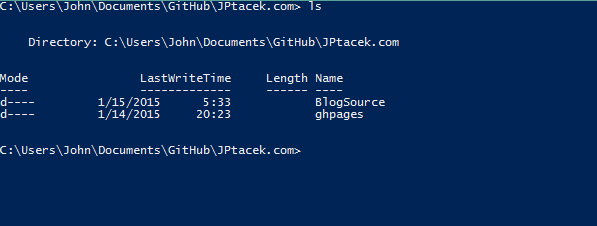
GitHub Pages. What I have done is reworked a couple of things with DocPad to support this. Previously, I had
my repository checked out locally to a directory called JPtacek.com. What I have done is keep this as the root
directory and created two subdirectories within there. The first directory, BlogSource, is the DocPad repository which
will be responsible for generating my static content from markdown files. I cloned my GitHub
https://github.com/jptacek/JPtacek.com repository here. The second directory, ghpages, is where
I cloned the https://github.com/jptacek/jptacek.github.io repository.
The next step is to be able to generate the content locally so I can push my static content from my local drive
to the https://github.com/jptacek/jptacek.github.io repository. This was done by updating my
DocPad environment a bit. In the DocPad configuration file, docpad.coffee, I created two environments, one
for local development, the default way I had been using DocPad previously before, and a second for static. The
static environment is what I use when I want to publish a new blog post. The main thing to note is the configuration setting for
outPath, which points up a directory level from where my DocPad environment is (the BlogSource) directory and
publishes files to the github.io directory(ghpages).
I can run this command by typing docpad -e static generate. After running DocPad and generating the static
content I am a commit and a push away from an updated website!
So in closing, my site is no longer hosted on Azure, but GitHub pages and it wasn't too painful. I am now saving $10-15
a month. This will translate to more coffee.
A high level overview about the pros and cons.
Pros about GitHub Pages
Free! Azure was costing from $10-$15/month
Bypass some CPU usage limits on Azure
Cons about GitHub Pages
Cannot automatically build sites from Git commits
No IPV6 support (issue with Azure Websites currently)


 I'm John Ptacek, a software developer for